
Tools of the Trade for Data Science
![]()
Jupyter
Jupyter (pronounced like the planet, Jupiter) is a tool that was developed as an open-source project to allow users to run code in a type of file called a notebook. A notebook is a file that contains a set of cells. Each cell can contain code; clicking on a code cell and then hitting its “run” button will execute the code. Any results (including graphics, formatted tables, or raw text) will be printed out right below the cell that generated them. Each cell can each contain many lines of code (like small program files), and a notebook can have many cells, each with bits of code. Moreover, notebooks are files, meaning that the entire contents are saved together, and can be reopened and re-run later — making the process reproducible. Perhaps the greatest advantage of notebooks over files containing code, however, is that the output of each cell is saved when the notebook file is saved. This means that you can write code to perform a task, such as analyzing a data set, and have the output right there with the commands that produced the output. Jupyter notebooks have revolutionized the practice of data science, and create an ideal environment for learning and communicating.
This file that you are currently reading is a Jupyter notebook! Below is a code cell. If you’re viewing this on a website, it just looks like an empty box. If you’re viewing this in CoCalc as part of a live workshop, you can try typing print('hello world!) into the cell below, and then pressing the Shift and Enter keys simultaneously to run the cell.
Another great feature of notebooks is that cells can contain either code, or text formatted in a simple language called Markdown. This means that in between your code cells, you can write blocks of text, for example to annotate or, essentially, “tell the story” of your data. Indeed, you could literally write a scientific manuscript in a Jupyter Notebook, with the advantage that it contained all of the reproducible code used to perform the analysis. We’ll talk more about Markdown later.
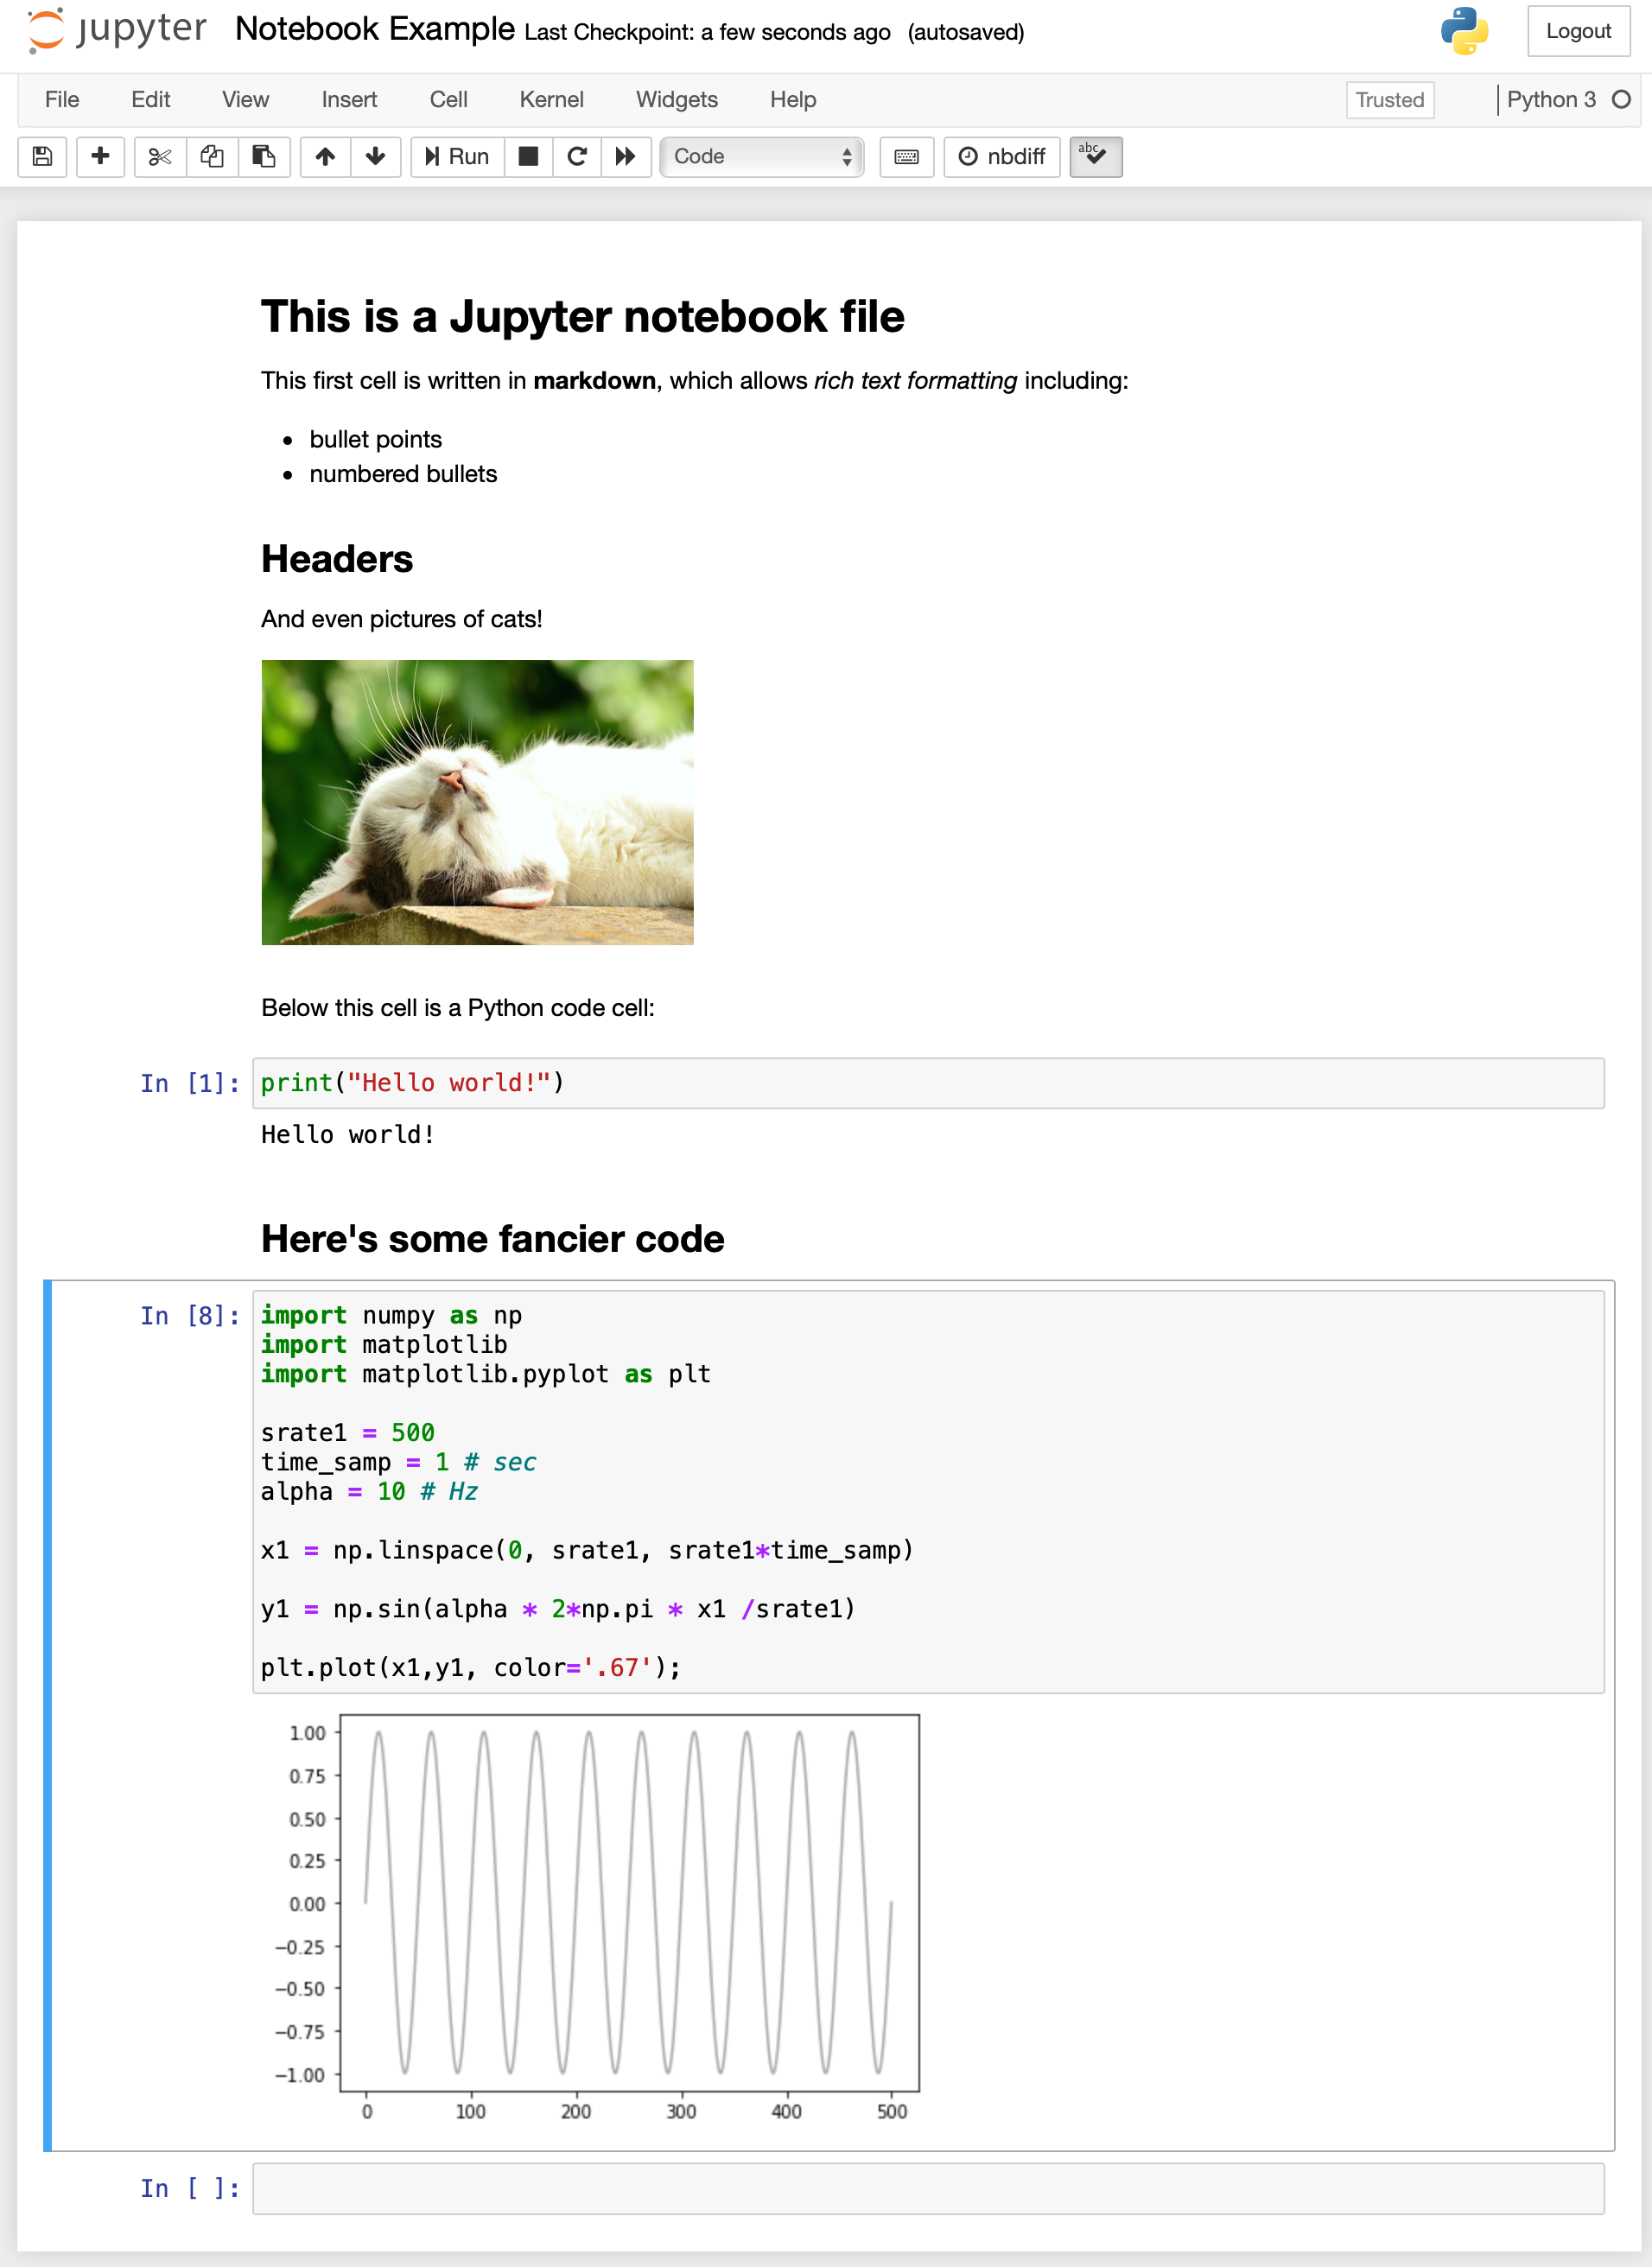
Here’s an example screenshot of a notebook file:
Jupyter notebooks have a number of other great design features. For one, notebooks were designed to run through a web browser, which means that you can run, and store, your analyses on a remote server, such as a cloud server, or one belonging to a lab or university. This means that you don’t have to worry about the storage, backups, or computational capabilities of the computer you’re working on (I’m guessing for most of you, this is a not-super-powerful laptop). In fact, there are a number of online cloud services for running Jupyter notebooks that you can use for free, including Google Collaboratory, and CoCalc. In the workshops we will use CoCalc. Cocalc’s implementation of Jupyter looks a little different from the screen shot above, but functions very much the same.
Another great feature of notebooks is that they can run code in a wide range of different languages. Indeed, the name “jupyter” comes from the names of the three first programming languages it supported: Julia, Python, and R. There are now over 100 different languages supported in Jupyter notebooks! Typically though, a given notebook file only runs a single language (called the kernel of the notebook), so you have to pick when you first create the file. For instance, this notebook is running a Python kernel. You can verify this by looking in the top right region of the notebook window. It should say “Python” there.
In this class, you will work extensively in Jupyter notebooks, and you will use them to complete and submit your assignments and projects, as well. There are lots of materials on the web to help you learn (or remember) how to use Jupyter notebooks, starting with their official website: https://jupyter.org.
![]()
CoCalc
CoCalc is a cloud service that hosts Jupyter notebooks. It is designed for collaboration and for use in teaching. It’s pretty awesome. CoCalc uses a “freemium” pricing model, whereby you can use it for free, but get significant improvements in service through a paid plan. SURGE covers the cost of CoCalc for the Discover Coding series, so you will receive access to an upgraded account for free, for the duration of the series you registered for. At the start of the first session, attendees will receive an invitation link sent to the email address they registered with (typically your dal.ca or other school address). Follow this and the instructions to set up your password and other account settings.
Using CoCalc has a number of advantages, including not needing to worry about installing Python on your own computer, or limitations of the type or specifications of the computer you have. As well, workshop attendees will have all the data files they need, and “skeleton” files for each workshop, automatically copied to their CoCalc accounts. An added advantage of the cloud platform is that members of the teaching team can see the work of any participant in the workshop. This is very useful when participants get stuck and need help.
At its core, CoCalc allows you to create and run Jupyter notebooks in a variety of prominent data science languages, including Python, R, and Julia. Is visual appearance is a bit different from the stock Jupyter as shown in the screenshot above, but the functionality is similar. In addition to Jupyter notebooks, CoCalc allows you to run a command-line terminal, create and edit Markdown files, and even create to-do lists. Each user logs into their own isolated environment, so your files and work are private from other students. Importantly, though, the teaching team will be able to see all of your files and code. They can do this in real time, similar to how people can collaborate “live” on Google Docs. This allows the teaching team to be able to look at your work and help you solve problems when you get stuck (but the teaching team can view all of your files). It’s the closest thing to having a teacher come look over your shoulder and point out where you’ve gone wrong.
CoCalc also allows Time Travel! It keeps track of every change you’ve made to a document, so that you can travel back in time if you accidentally delete something, or decide your earlier work was better, etc.. Your dog will never be able to eat your homework, and you will never have to worry about backups, or failed hard drives destroying your work for this class.
You should check out the CoCalc Student Guide.
CoCalc is a great example of the value of open source software. It uses the open-source Jupyter project and free software tools like Python and Markdown. Moreover, it is actually a product of an open source project called SageMath. SageMath is a mathematical software platform that integrates Python, R, and a variety of other languages and tools (and indeed, you can run SageMath from within CoCalc). SageMath was created by mathematician (and skateboarder) William Stein in 2005, when he was a professor at Harvard. He held a couple of other university faculty jobs before quitting in 2019 to run SageMath full time. CoCalc is a revenue-generating operation that helps pay his salary and support the ongoing development of SageMath.
Your account on Cocalc will persist even after the workshop ends. The only difference will be that your paid license will expire, so the performance of your notebooks will suffer (generally be slower). But for the purposes of practicing Python, it should serve you fine. This also means that all the files and work you do in this workshop will be preserved on CoCalc indefinitely, and you can download all the files to your personal computer if you wish. If you really like CoCalc, you can pay to use it yourself after Discover Coding ends. However, if you consider using these for data analysis in the future, be sure that any data you upload is anonymized and so uploading to a public (and likely US-based) server does not violate research ethics or privacy laws.
Alternatives to CoCalc
You can install Jupyter on your personal computer. There are a variety of ways to do this, but we recommend installing Anaconda Python. Anaconda is designed for scientific coding, and you will get a full installation of Python, with Jupyter and virtually every other tool you will want for data science or scientific coding.
There are also various other free cloud-based Jupyter notebook services, including Google Colaboratory. These are worth knowing about, and you may want to use them for your own projects, or just for playing around, in the future. They don’t offer the same great features of CoCalc for classes - in particular for Discover Coding, the ability for members of the teaching team to view your notebooks live during a session, to provide you with help.
For the Discover Coding workshop series, SURGE only supports the use of CoCalc. This is the best way for us to provide support while making this free series open to the maximum number of people. Especially in a remote environment, our teaching team cannot troubleshoot installation problems on your personal computer, nor can they easily view your work the way they can on CoCalc. Our team is also only trained in working with CoCalc, and so they may have less familiarity with other implementaitons you are using. So, you are welcome to participate int he workshop using whatever implementation of Python you wish, but our ability to troubleshoot will be limited if you are not working on CoCalc. Novice users should definitely start with CoCalc. At the end of each workshop series, the instructor will discuss installing Python and Jupyter on your personal computer, for those who are interested.
![]()
Markdown
In addition to code cells, Jupyter notebooks can contain Markdown cells with formatted text, images, and mathematical formulae. Markdown is a “plain text formatting syntax” and a tool for converting such plain text to a formatted version, such as HTML for display in a web page. There is a fundamental difference between plain text (.txt files) versus rich text (such as in Markdown, and also Microsoft Word or Google Docs). Rich text files display the text that you enter, and the formatting you choose (e.g., boldface), and hide the information telling your computer to make that text boldface “behind the scenes” in a complex file. In contrast, when you open a plain text file, what you see is literally the contents of that file, with nothing hiding in the background (except for a couple of hidden features, like markers for line breaks and tabs).
So a plain text file can never contain formatting like boldface or italic. Markdown allows you to create a text file with special codes that you type to “mark” certain text for formatting, and then run a program on that text file to produce a formatted output. We’ll show examples of this in a future lesson in this workshop.
Getting help in this workshop
Our teaching team consists of a lead instructor (sometimes more than one), plus helpers. The helpers are there to support you if you have qustions or need help. They can dierct-message with you on Zoom, start a Zoom breakout room to voice/video chat with you, and they can view your CoCalc files directly to see the code you’ve written and help troubleshoot.
Helpers are recognizable on Zoom because they have “helper” in their screen name.
To request help from a helper
If you need help from a helper, use the “no” option (red circle with an X in it) under “Reactions” in Zoom. Reactions is usually a smileyface icon in the row of icons at the bottom of your Zoom window. You may have to move your mouse over the window for these icons to appear. A helper will contact you by direct-message on Zoom, so open and watch the Chat window (which is also in the icon bar in Zoom).
Check-Ins
Periodically throughout the workshop, the instructor will pause and check in with all participants. We do this to help ensure that no one gets left behind. For check-ins, we will ask everyone to indicate if they’re following along, or if they are feeling lost. You respond by using Zoom Reactions: “yes” (green circle/checkmark) if you’re doing fine, or “no” (red circle/x) if you’re lost or just need timet to catch up. It’s normal to get confused or bogged down when you’re learning to code, so don’t be shy about this! For people who indicate “no”, either the instructor or a help will follow up to help you get back on track.
Asking questions of the instructor
Check-ins are also a time when you can ask questions of the instructor. If you wish to ask the instructor a question while they are actively teaching, you can use the “Raise hand” reaction in Zoom.
In general, if you are stuck, confused, your code is generating errors, or you’re having other issues related to working through the lesson, you should use the “no” reaction to request a helper. On the other hand, you can ask the instructor questions about the content of the lessons, such as if you don’t understand the concepts being explianed, or you’re wondering how they would be used, etc..
Pro Tip:
When working from examples that you find on the web, resist the temptation to copy and paste them, and instead re-type them yourself. While you may make a few more errors (and it's slower), *it's a much better learning technique*. Although you are, hopefully, reading the code you copy, and trying to understand it, you tend to learn and retain more if you type it out yourself (just like taking notes is more effective than just reading a book or listening to a lecture).Licensed under CC-BY 4.0 2021 by SURGE